Step 1: Install Laravel 11
If you already have a running Laravel project, you can skip this step. However, if you need to create a new Laravel 11 project, follow the command below to set up your application:
composer create-project laravel/laravel google-recaptcha-example-app
This command will create a new Laravel application named google-recaptcha-example-app.
Step 2: Add Google API Key
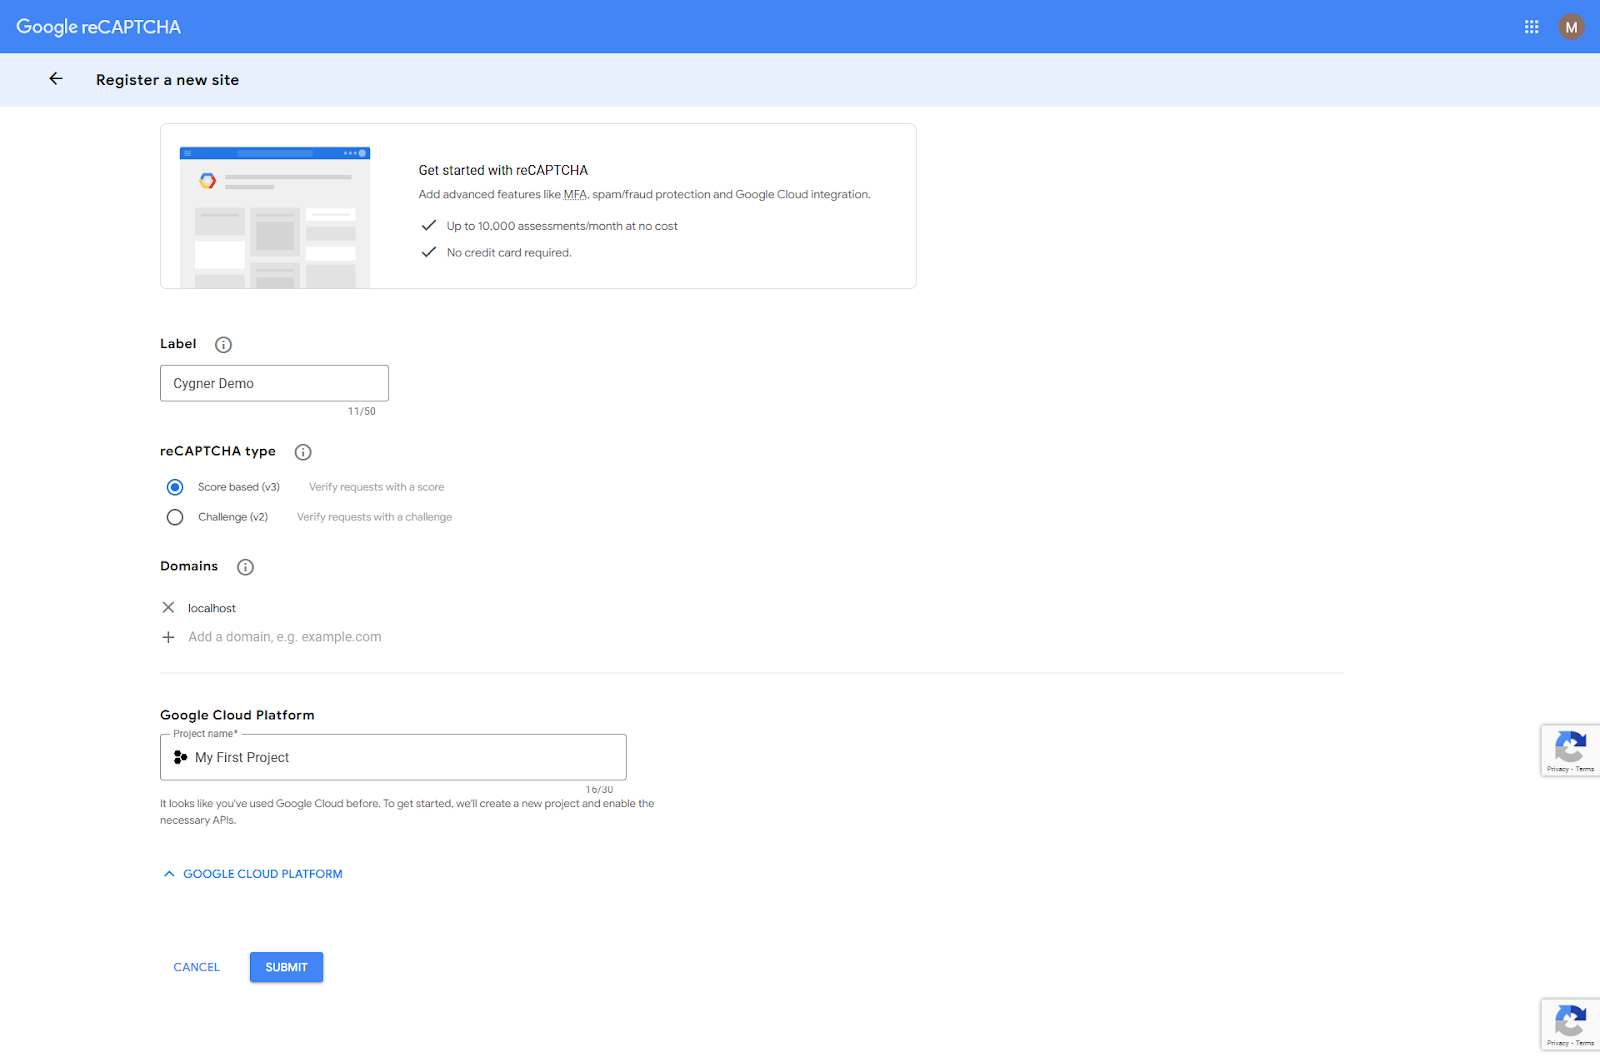
To integrate Google reCAPTCHA v3 into your Laravel 11 application, you need to configure the Site Key and Secret Key. If you don’t already have these keys, you can generate them by following the steps below:
- Visit the Google reCAPTCHA Admin Console.
- Log in with your Google account.
- Register a new site.
- Fill out the form:
- Label: Provide a name for your project (e.g., "Laravel Recaptcha Example").
- reCAPTCHA Type: Select reCAPTCHA v3.
- Domains: Enter your application’s domain (e.g., localhost or 127.0.0.1 or google-recaptcha-example-app.com for local development or your production domain).
Accept the terms of service and click Submit.
Once the site is registered, you will receive a Site Key and a Secret Key as like below:
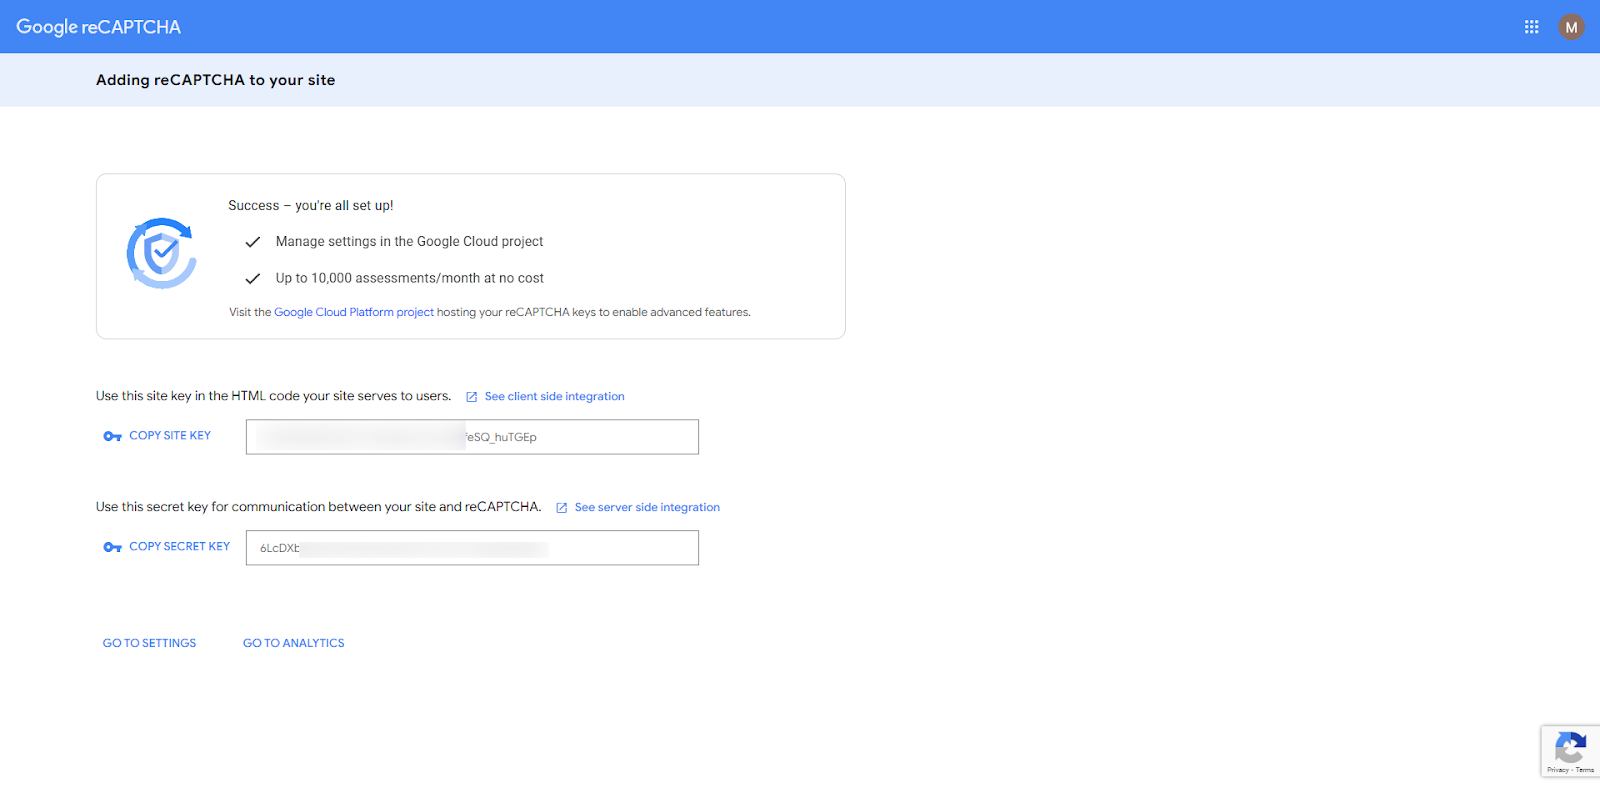
Next, add these keys to your .env file:
RECAPTCHA_SITE_KEY=your-site-key-here
RECAPTCHA_SECRET_KEY=your-secret-key-here
Ensure these keys are securely stored and not exposed in your codebase. With the API keys configured, you're now ready to proceed to the next step!
Step 3: Create a Validation Rule
In this step, we will create a custom validation rule named ReCaptcha to verify user submissions against the Google reCAPTCHA v3 API. This rule will help determine whether the request is from a real user or a bot.
Step 3.1: Generate the Validation Rule
php artisan make:rule ReCaptcha
This will generate a new file located at: app/Rules/ReCaptcha.php
Step 3.2: Update the ReCaptcha Rule
Open the ReCaptcha.php file and update it as follows:
<?php

namespace App\Rules;

use Closure;
use Illuminate\Contracts\Validation\ValidationRule;
use Illuminate\Support\Facades\Http;

class ReCaptcha implements ValidationRule
{
    /**
     * Run the validation rule.
     *
     * @param  \Closure(string, ?string=): \Illuminate\Translation\PotentiallyTranslatedString  $fail
     */
    public function validate(string $attribute, mixed $value, Closure $fail): void
    {
        $response = Http::get("https://www.google.com/recaptcha/api/siteverify",[
            'secret' => env('RECAPTCHA_SECRET_KEY'),
            'response' => $value
        ]);

        if (!($response->json()["success"] ?? false)) {
            $fail('The google recaptcha is required.');
        }
    }
}
Step 4: Create a Controller
In this step, we will create a new controller named ContactController to handle the contact form logic, including reCAPTCHA validation.
Step 4.1: Generate the Controller
Run the following Artisan command to create the controller:
php artisan make:controller ContactController
This command will create a new file located at:
app/Http/Controllers/ContactController.php
Step 4.2: Update the Controller
Open the ContactController.php file and add the following methods:
<?php

namespace App\Http\Controllers;

use App\Rules\ReCaptcha;
use Illuminate\Contracts\View\View;
use Illuminate\Http\RedirectResponse;
use Illuminate\Http\Request;

class ContactController extends Controller
{
    /**
     * Display the contact form.
     */
    public function index(): View
    {
        return view('contact');
    }

    /**
     * Handle the form submission.
     */
    public function store(Request $request): RedirectResponse
    {
        // Validate the form inputs
        $request->validate([
            'name' => 'required',
            'phone' => 'required|digits:10|numeric',
            'message' => 'required',
            'g-recaptcha-response' => ['required', new ReCaptcha],
        ]);

        // Retrieve all form inputs
        $input = $request->all();

        /*--------------------------------------------
        | Write code here to store the data in the database
        | Example: Contact::create($input);
        --------------------------------------------*/

        // Redirect back with a success message
        return redirect()->back()->with(['success' => 'Contact form submitted successfully.']);
    }
}
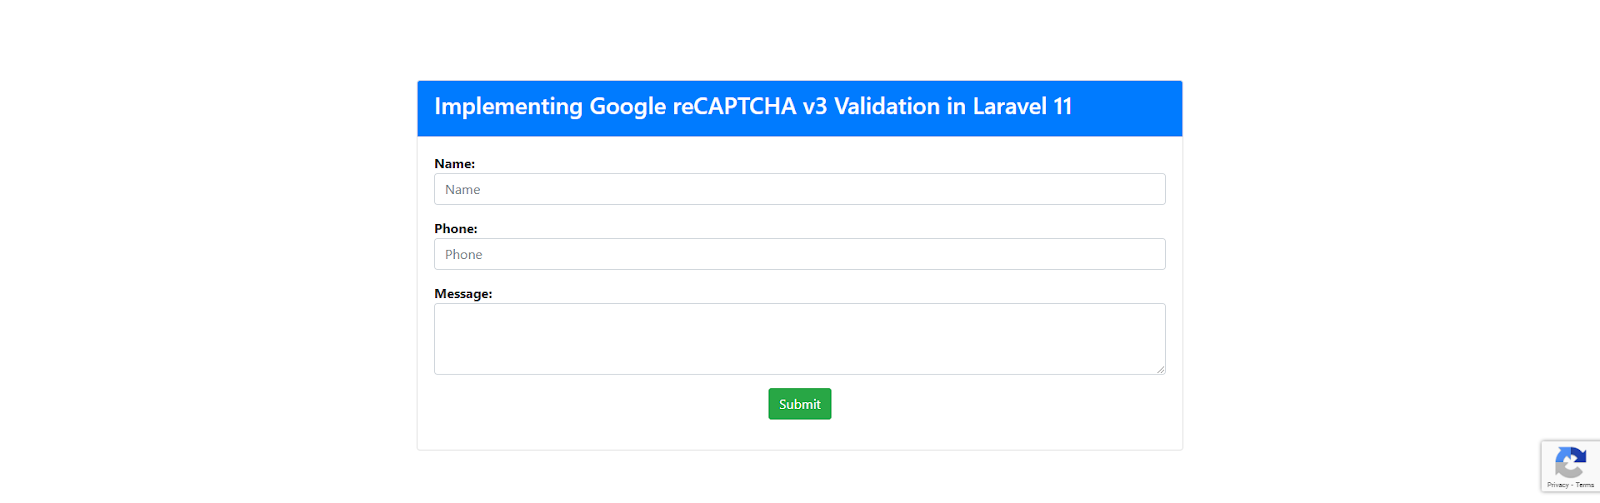
Step 5: Create the View File
In this step, we create a Blade view file, contact.blade.php, to display a contact form integrated with Google reCAPTCHA v3.
File Location:
resources/views/contact.blade.php
Open the contact.blade.php file and add the following code:
<!DOCTYPE html>
<html>
<head>
    <title>Implementing Google reCAPTCHA v3 Validation in Laravel 11</title>
    <meta charset="utf-8">
    <meta http-equiv="X-UA-Compatible" content="IE=edge">
    <meta name="viewport" content="width=device-width, initial-scale=1">
    <link rel="stylesheet" href="https://cdnjs.cloudflare.com/ajax/libs/twitter-bootstrap/4.5.2/css/bootstrap.min.css" />
    <script src="https://code.jquery.com/jquery-3.4.1.min.js"></script>
    <script src="https://www.google.com/recaptcha/api.js"></script>
</head>
<body>
    <div class="container">
        <div class="row mt-5 mb-5">
            <div class="col-10 offset-1 mt-5">
                <div class="card">
                    <div class="card-header bg-primary">
                        <h3 class="text-white">Implementing Google reCAPTCHA v3 Validation in Laravel 11</h3>
                    </div>
                    <div class="card-body">
                        <form method="POST" action="{{ route('contact.store') }}" id="contactUSForm">
                            {{ csrf_field() }}

                            <!-- Name Field -->
                            <div class="row">
                                <div class="col-md-12">
                                    <div class="form-group">
                                        <strong>Name:</strong>
                                        <input type="text" name="name" class="form-control" placeholder="Name" value="{{ old('name') }}">
                                        @if ($errors->has('name'))
                                            <span class="text-danger">{{ $errors->first('name') }}</span>
                                        @endif
                                    </div>
                                </div>
                            </div>

                            <!-- Phone Field -->
                            <div class="row">
                                <div class="col-md-12">
                                    <div class="form-group">
                                        <strong>Phone:</strong>
                                        <input type="text" name="phone" class="form-control" placeholder="Phone" value="{{ old('phone') }}">
                                        @if ($errors->has('phone'))
                                            <span class="text-danger">{{ $errors->first('phone') }}</span>
                                        @endif
                                    </div>
                                </div>
                            </div>

                            <!-- Message Field -->
                            <div class="row">
                                <div class="col-md-12">
                                    <div class="form-group">
                                        <strong>Message:</strong>
                                        <textarea name="message" rows="3" class="form-control">{{ old('message') }}</textarea>
                                        @if ($errors->has('message'))
                                            <span class="text-danger">{{ $errors->first('message') }}</span>
                                        @endif
                                        @if ($errors->has('g-recaptcha-response'))
                                            <span class="text-danger">{{ $errors->first('g-recaptcha-response') }}</span>
                                        @endif
                                    </div>
                                </div>
                            </div>

                            <!-- Submit Button with reCAPTCHA -->
                            <div class="form-group text-center">
                                <button class="g-recaptcha btn btn-success btn-submit"
                                    data-sitekey="{{ env('RECAPTCHA_SITE_KEY') }}"
                                    data-callback='onSubmit'
                                    data-action='submit'>Submit</button>
                            </div>
                        </form>
                    </div>
                </div>
            </div>
        </div>
    </div>
</body>

<script type="text/javascript">
    function onSubmit(token) {
        document.getElementById("contactUSForm").submit();
    }
</script>
</html>
Step 6: Create Routes
In this step, we define the routes for the contact form. One route will display the form (GET request), and the other will handle form submissions (POST request).
File Location:
routes/web.php
Add the Routes below code:
<?php

use App\Http\Controllers\ContactController;
use Illuminate\Support\Facades\Route;

// Route to display the contact form
Route::get('contact', [ContactController::class, 'index']);

// Route to handle the contact form submission
Route::post('contact', [ContactController::class, 'store'])->name('contact.store');
By adding these routes, the contact form is now fully functional. Users can access the form via /contact and submit it, where reCAPTCHA validation will ensure security.