1) Introduction
In today's digital-first world, accepting online payments is essential for any business or service provider. Whether running an e-commerce store, a booking system, or a subscription-based service, having a reliable and developer-friendly payment gateway is crucial. That's where Razorpay comes in.
Razorpay is one of the most popular and trusted payment gateways in India. It offers a seamless integration experience, robust documentation, and support for various payment methods, including credit/debit cards, UPI, net banking, wallets, and more. It also provides features like payment links, subscriptions, invoicing, and instant settlements.
In this tutorial, we’ll walk you through the process of integrating Razorpay into a plain PHP application, without using any framework like Laravel or CodeIgniter. This will give you a clean, minimal example you can adapt to any PHP project.
2) Create a Razorpay Account & Get API Keys
Before we can integrate Razorpay into our PHP application, we need to set up a Razorpay account and generate the necessary API credentials.
Step 1: Sign Up on Razorpay
Create a Razorpay account.
After signing up, you’ll be redirected to the Razorpay Dashboard.
Step 2: Switch to Test Mode
Ensure you're in Test Mode during development, as Razorpay provides both Test and Live modes.
Step 3: Generate API Keys
From the dashboard, navigate to:
Account & Settings → API Keys (under Website and app settings) → Generate Key
Save Key ID and Key Secret securely
3) Set up Project Folder Structure
Let’s create a basic file structure for our Razorpay integration project. We’ll keep it simple and modular so it’s easy to follow.
1. Create the project folder:
mkdir razorpay-php-integration
cd razorpay-php-integration
2. Initialize Composer (if not already done):
composer init
3. Install Razorpay PHP SDK:
composer require razorpay/razorpay
This will create a vendor/ directory and add the Razorpay SDK to your project.
4. Create Basic Files:
Create the following files using your code editor:
- index.php
- payment.php
- success.php
- config.php
4) Create Payment Page (index.php)
This is the page where users will enter their details and initiate the payment. We'll use Razorpay's Checkout.js to trigger the payment modal.
<!DOCTYPE html>
<html>
<head>
    <title>Razorpay Payment Gateway Integration</title>

    <style>
        body {
            display: flex;
            justify-content: center;
            align-items: center;
            height: 100vh;
            margin: 0;
            font-family: Arial, sans-serif;
	background: #7bb5e7;
        }

        #paymentForm {
            padding: 20px;
            border: 1px solid #ccc;
            border-radius: 10px;
            box-shadow: 0 0 10px rgba(0, 0, 0, 0.1);
            background-color: #f9f9f9;
        }

        input, button {
            width: 100%;
            padding: 10px;
            margin-top: 5px;
            box-sizing: border-box;
        }
    </style>
</head>
<body>

    <form id="paymentForm">
        <h2>Pay with Razorpay</h2>
        <input type="text" id="name" placeholder="Enter your name" required><br><br>
        <input type="email" id="email" placeholder="Enter your email" required><br><br>
        <input type="number" id="amount" placeholder="Amount in INR" required><br><br>
        <button type="button" id="payBtn">Pay Now</button>
    </form>

    <!-- Razorpay Checkout.js -->
    <script src="https://checkout.razorpay.com/v1/checkout.js"></script>
    <script>
        document.getElementById('payBtn').onclick = function(e) {
            e.preventDefault();

            const name = document.getElementById('name').value;
            const email = document.getElementById('email').value;
            const amount = document.getElementById('amount').value;

            // Send data to backend to create order
            fetch('payment.php', {
                method: 'POST',
                headers: {
                    'Content-Type': 'application/json'
                },
                body: JSON.stringify({ name, email, amount })
            })
            .then(response => response.json())
            .then(data => {
                const options = {
                    key: data.key, // Razorpay Key ID
                    amount: data.amount, // amount in paisa
                    currency: "INR",
                    name: data.name,
                    description: "Test Transaction",
                    order_id: data.order_id,
                    handler: function (response){
                        // On payment success, redirect or send data to success.php
                        window.location.href = `success.php?payment_id=${response.razorpay_payment_id}&order_id=${response.razorpay_order_id}&signature=${response.razorpay_signature}`;
                    },
                    prefill: {
                        name: name,
                        email: email
                    },
                    theme: {
                        color: "#3399cc"
                    }
                };
                const rzp = new Razorpay(options);
                rzp.open();
            })
            .catch(error => console.error('Error:', error));
        };
    </script>
</body>
</html>
5) Create Order in Backend (payment.php)
This script handles the AJAX request from the frontend, creates a Razorpay order using the PHP SDK, and returns the order details to the client.
<?php
require 'vendor/autoload.php';
require 'config.php';

use Razorpay\Api\Api;

// Get POST data from JavaScript
$input = json_decode(file_get_contents('php://input'), true);
$name = htmlspecialchars($input['name']);
$email = htmlspecialchars($input['email']);
$amount = (int) $input['amount'] * 100; // Convert INR to paisa

// Initialize Razorpay API with Key ID and Secret
$api = new Api($razorpayKeyId, $razorpayKeySecret);

// Create order
$orderData = [
    'receipt'         => uniqid(),
    'amount'          => $amount,
    'currency'        => 'INR',
    'payment_capture' => 1 // Auto capture
];

$razorpayOrder = $api->order->create($orderData);

$response = [
    'key'       => $razorpayKeyId,
    'amount'    => $amount,
    'name'      => $name,
    'order_id'  => $razorpayOrder['id']
];

// Return JSON to frontend
header('Content-Type: application/json');
echo json_encode($response);
6) Create config.php
Here, in this file, we will store Razorpay Key ID and Key Secret.
<?php
$razorpayKeyId = 'rzp_test_YourKeyId';
$razorpayKeySecret = 'YourKeySecret';
7) Handle Payment Success (success.php)
After a successful payment, Razorpay will redirect the user to success.php with query parameters like razorpay_payment_id, razorpay_order_id, and razorpay_signature. You must verify the signature to ensure the payment wasn’t tampered with.
<?php
require 'vendor/autoload.php';
require 'config.php';

use Razorpay\Api\Api;
use Razorpay\Api\Errors\SignatureVerificationError;

$success = false;
$error = "";

if (!empty($_GET['payment_id']) && !empty($_GET['order_id']) && !empty($_GET['signature'])) {
    $api = new Api($razorpayKeyId, $razorpayKeySecret);

    try {
        // Prepare attributes to verify signature
        $attributes = [
            'razorpay_order_id' => $_GET['order_id'],
            'razorpay_payment_id' => $_GET['payment_id'],
            'razorpay_signature' => $_GET['signature']
        ];

        $api->utility->verifyPaymentSignature($attributes);
        $success = true;

        // ✅ You can store the payment in your database here
        // Example: Save to MySQL with status = "success"

    } catch (SignatureVerificationError $e) {
        $success = false;
        $error = 'Razorpay Error: ' . $e->getMessage();
    }
}
?>

<!DOCTYPE html>
<html>
<head>
    <title>Payment Status</title>
</head>
<body>
    <?php if ($success): ?>
        <h2>✅ Payment Successful!</h2>
        <p>Payment ID: <?php echo $_GET['payment_id']; ?></p>
        <p>Order ID: <?php echo $_GET['order_id']; ?></p>
    <?php else: ?>
        <h2>❌ Payment Failed</h2>
        <p><?php echo $error; ?></p>
    <?php endif; ?>
</body>
</html>
8) Test Integration With Screenshots
- When you run index.php, you’ll see a simple payment form with fields for Name, Email, Amount, and a "Pay Now" button.
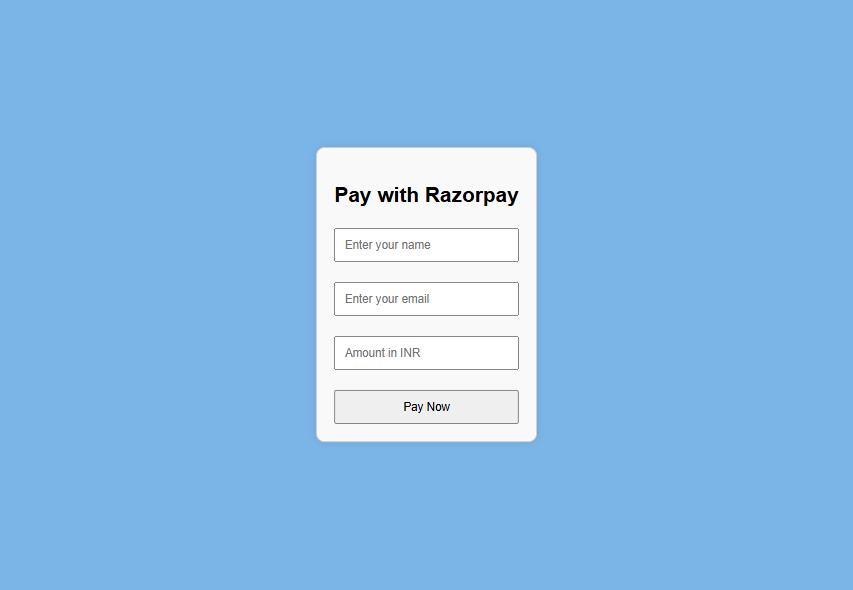
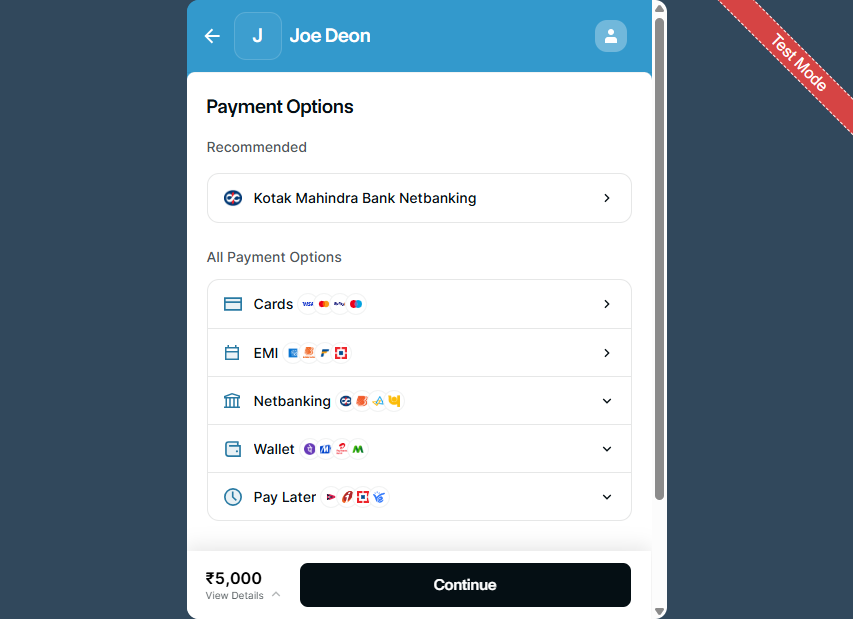
- After filling in the Name, Email, and Amount fields and clicking the "Pay Now" button, the Razorpay payment popup will appear, allowing you to complete the transaction.
- After completing the payment, you will be redirected to the success.php page, where a confirmation message will be displayed indicating that the transaction was successful.